Notification Types
Notification types are objects that encapsulate all the information ADSP needs to notify subscribers when one or more domain events are triggered by an application. The objects contain such information as:
- a name and description, for reference,
- how the user should be notified (email, sms, bot),
- the events that will trigger the notification,
- the roles needed for someone to be subscribed,
- the message sent to users when a notification is triggered, and
- the criteria to use when determining which subscribers to notify.
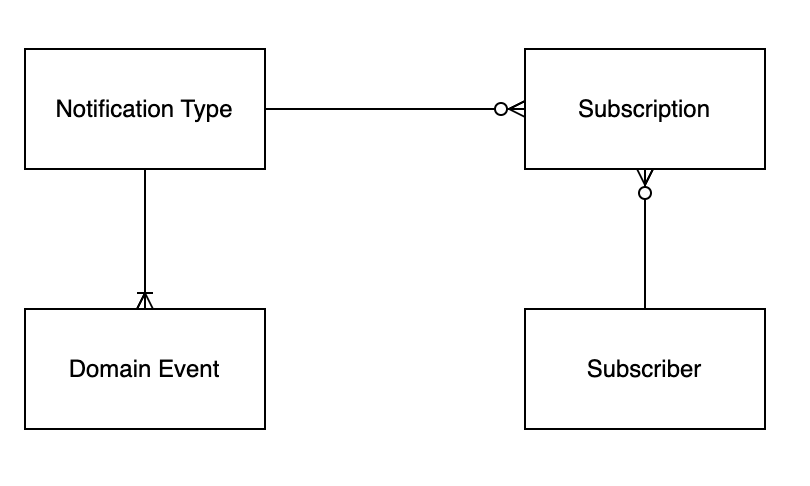
They are at the heart of the Notification Service. End-users are subscribed to Notification Types, which contain a set of domain events that when triggered, result in notifications being sent to users. The relationships between the various entities looks like this:
Example
Lets take a look at an example. Before you can create a notification type you first have to decide on a set of domain events and create those through the Event Service, as described here. Then select the notification service from left hand menu and click on the Add notification type button. You will see the following modal:
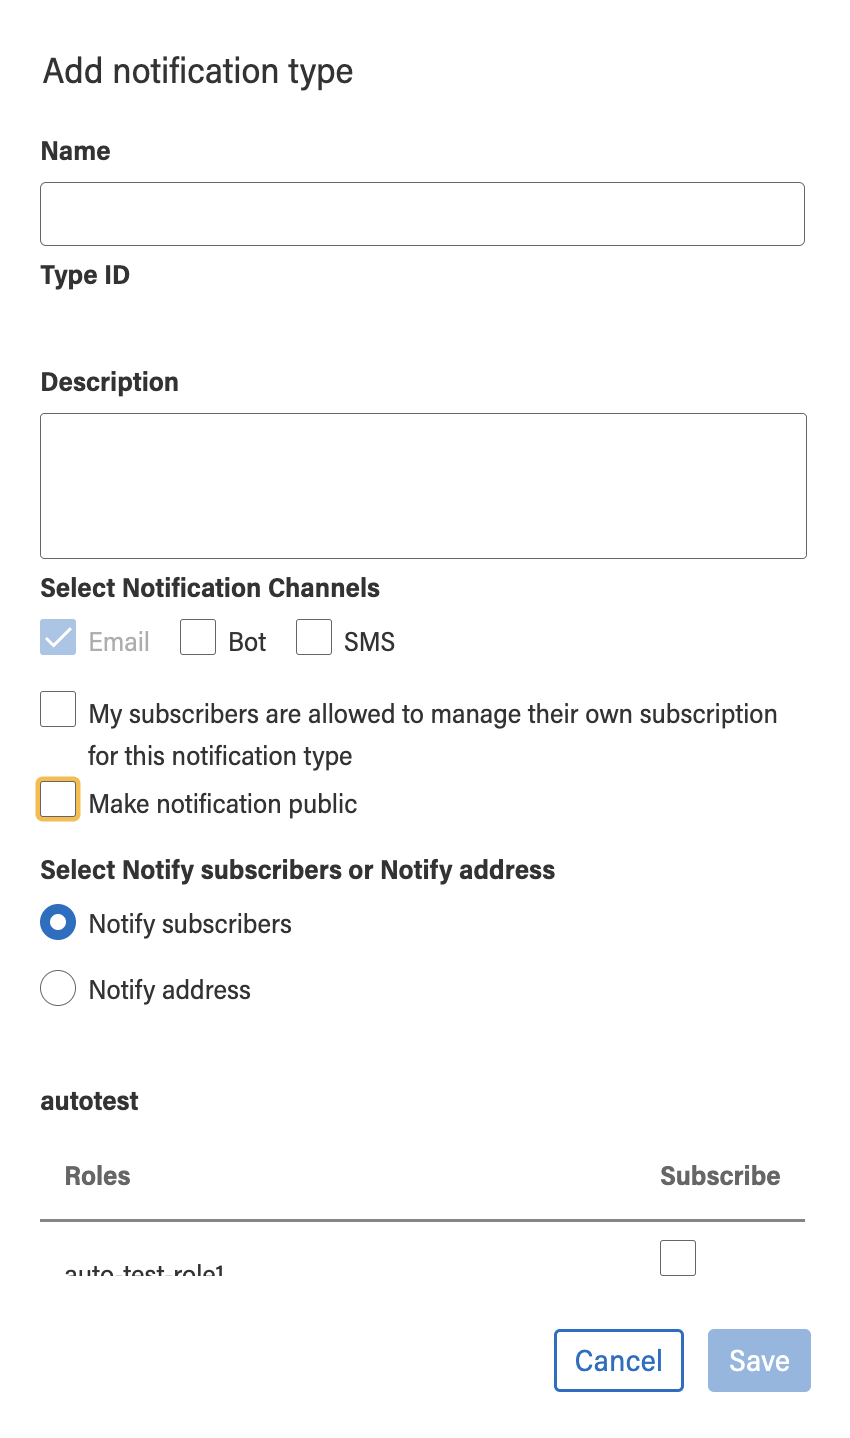
The name and description fields are for your information, to be able to distinguish between several notification types. The Id is automatically generated based on the name, and is very important for use when subscribing users to the type. You will need to use it in the API calls. In our case the Notification Type will be called “Application Status”, as it will be used to inform grant applicants of status changes in their applications.
Notification Channels
The Notification Channels tell the system how to send the notifications. Your choices are through email, as a text message, or through a bot. The latter can be used to send messages via Slack, or Teams. You can use any combination of the channels. In this case we allow users to choose email and/or text messages.
The next checkbox tells the system how you want to manage your subscribers. They can be self managed, in which they would use ADSP’s Subscriber App, or they can be managed by an application through the use of the Notification Service APIs. In this example we want the application to manage the subscriptions, so the box is left unchecked.
The final checkbox allows anyone - i.e. the public - to subscribe for notifications. Again, in this example, the box is left unchecked. Only registered grant-applicants will need notifications.
Save your changes, and scroll down the alphabetical list of notification types till you find the one you just created. It should look something like this:
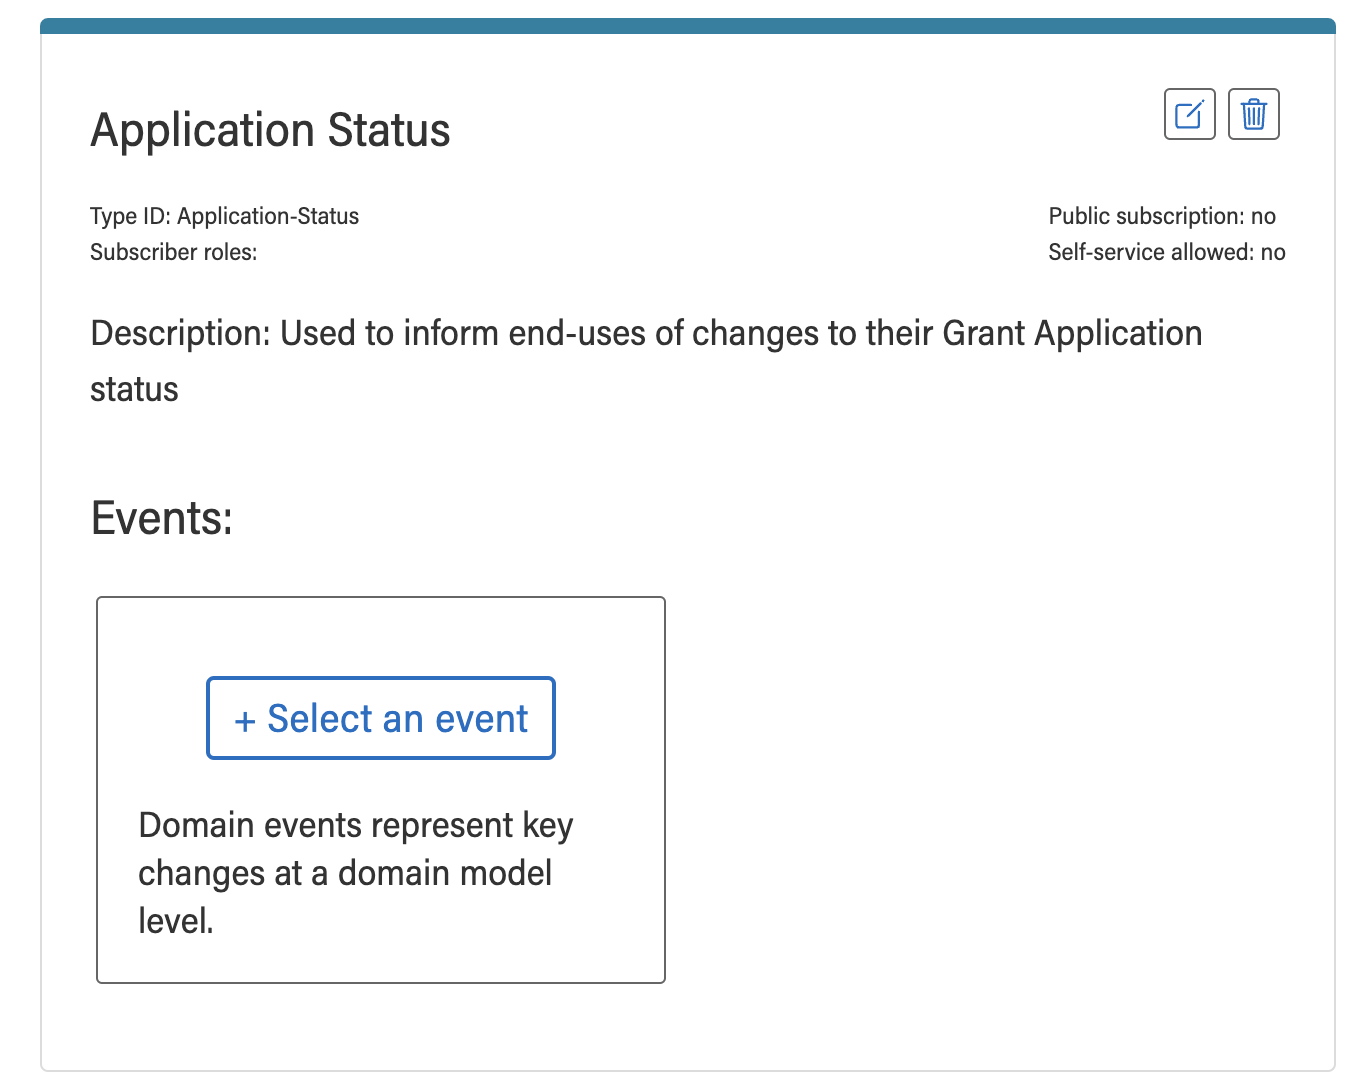
Notice that all the information you entered is displayed in the widget. You can always edit and update this information as you progress in your application development. But the notification type is not yet finished. You still need to tell the system which events will trigger these notification, and what the messages will look like.
Add Events
Click on the “Select an event” button to bring up the modal:
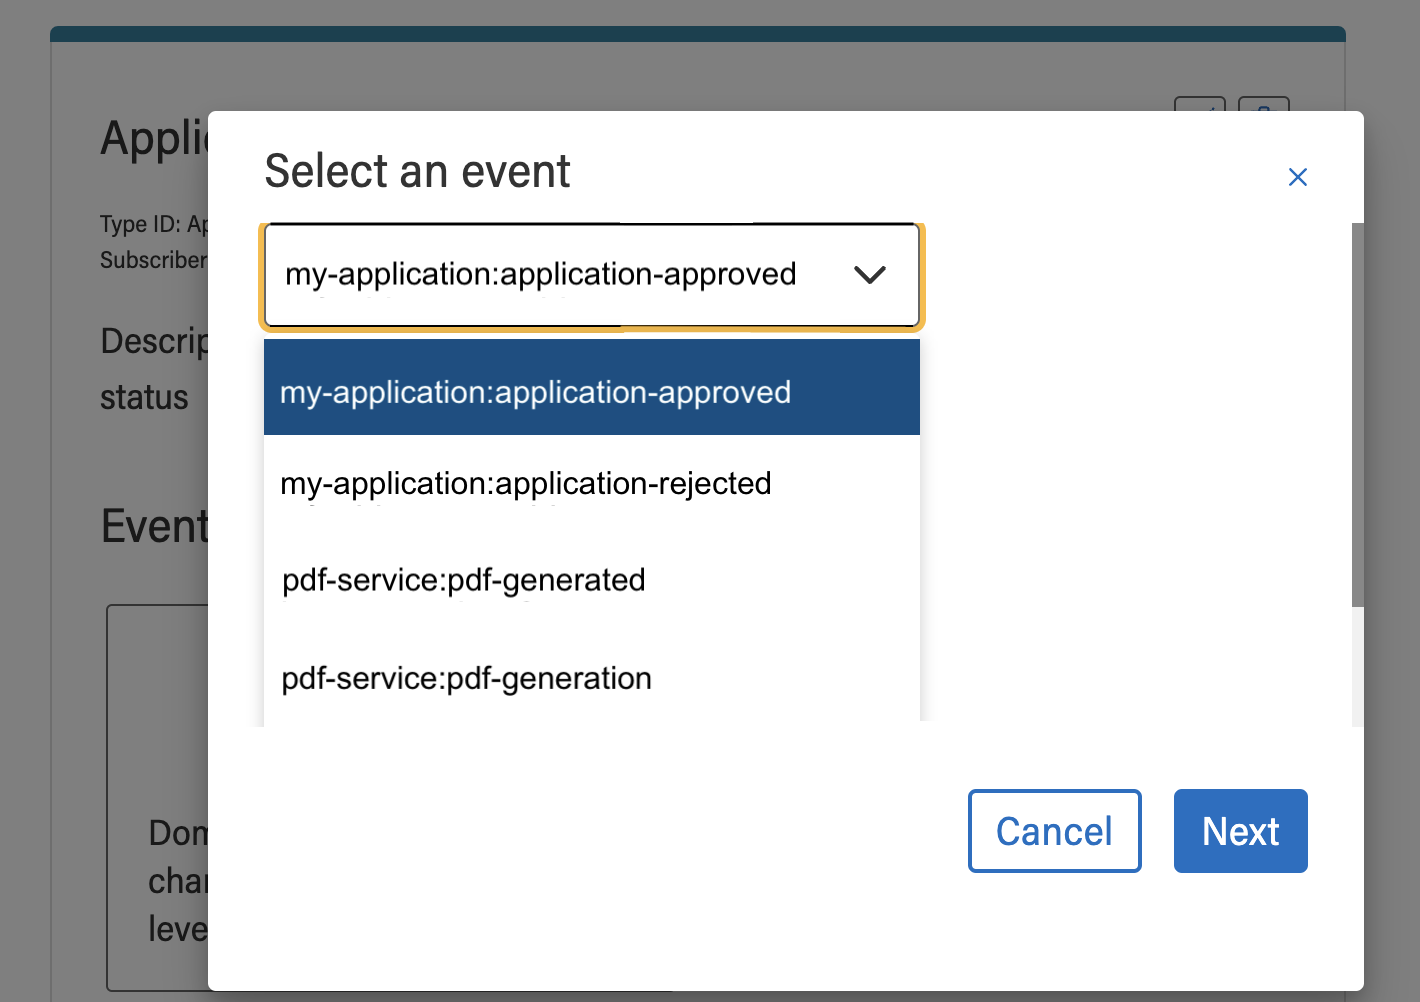
Select an event from the dropdown list and press next. You will be brought to the notification editor where you will be prompted to enter the message that is sent when the notification is triggered. Depending on which Notification Channels you selected when creating the Notification Type, you will be presented with one or more tabs for creating messages.
Choose Notification Method
Notifications can be sent either to Subscribers, or directly to an email address.
Add Notification Messages
In this example, we’ve chosen to add an Email message:
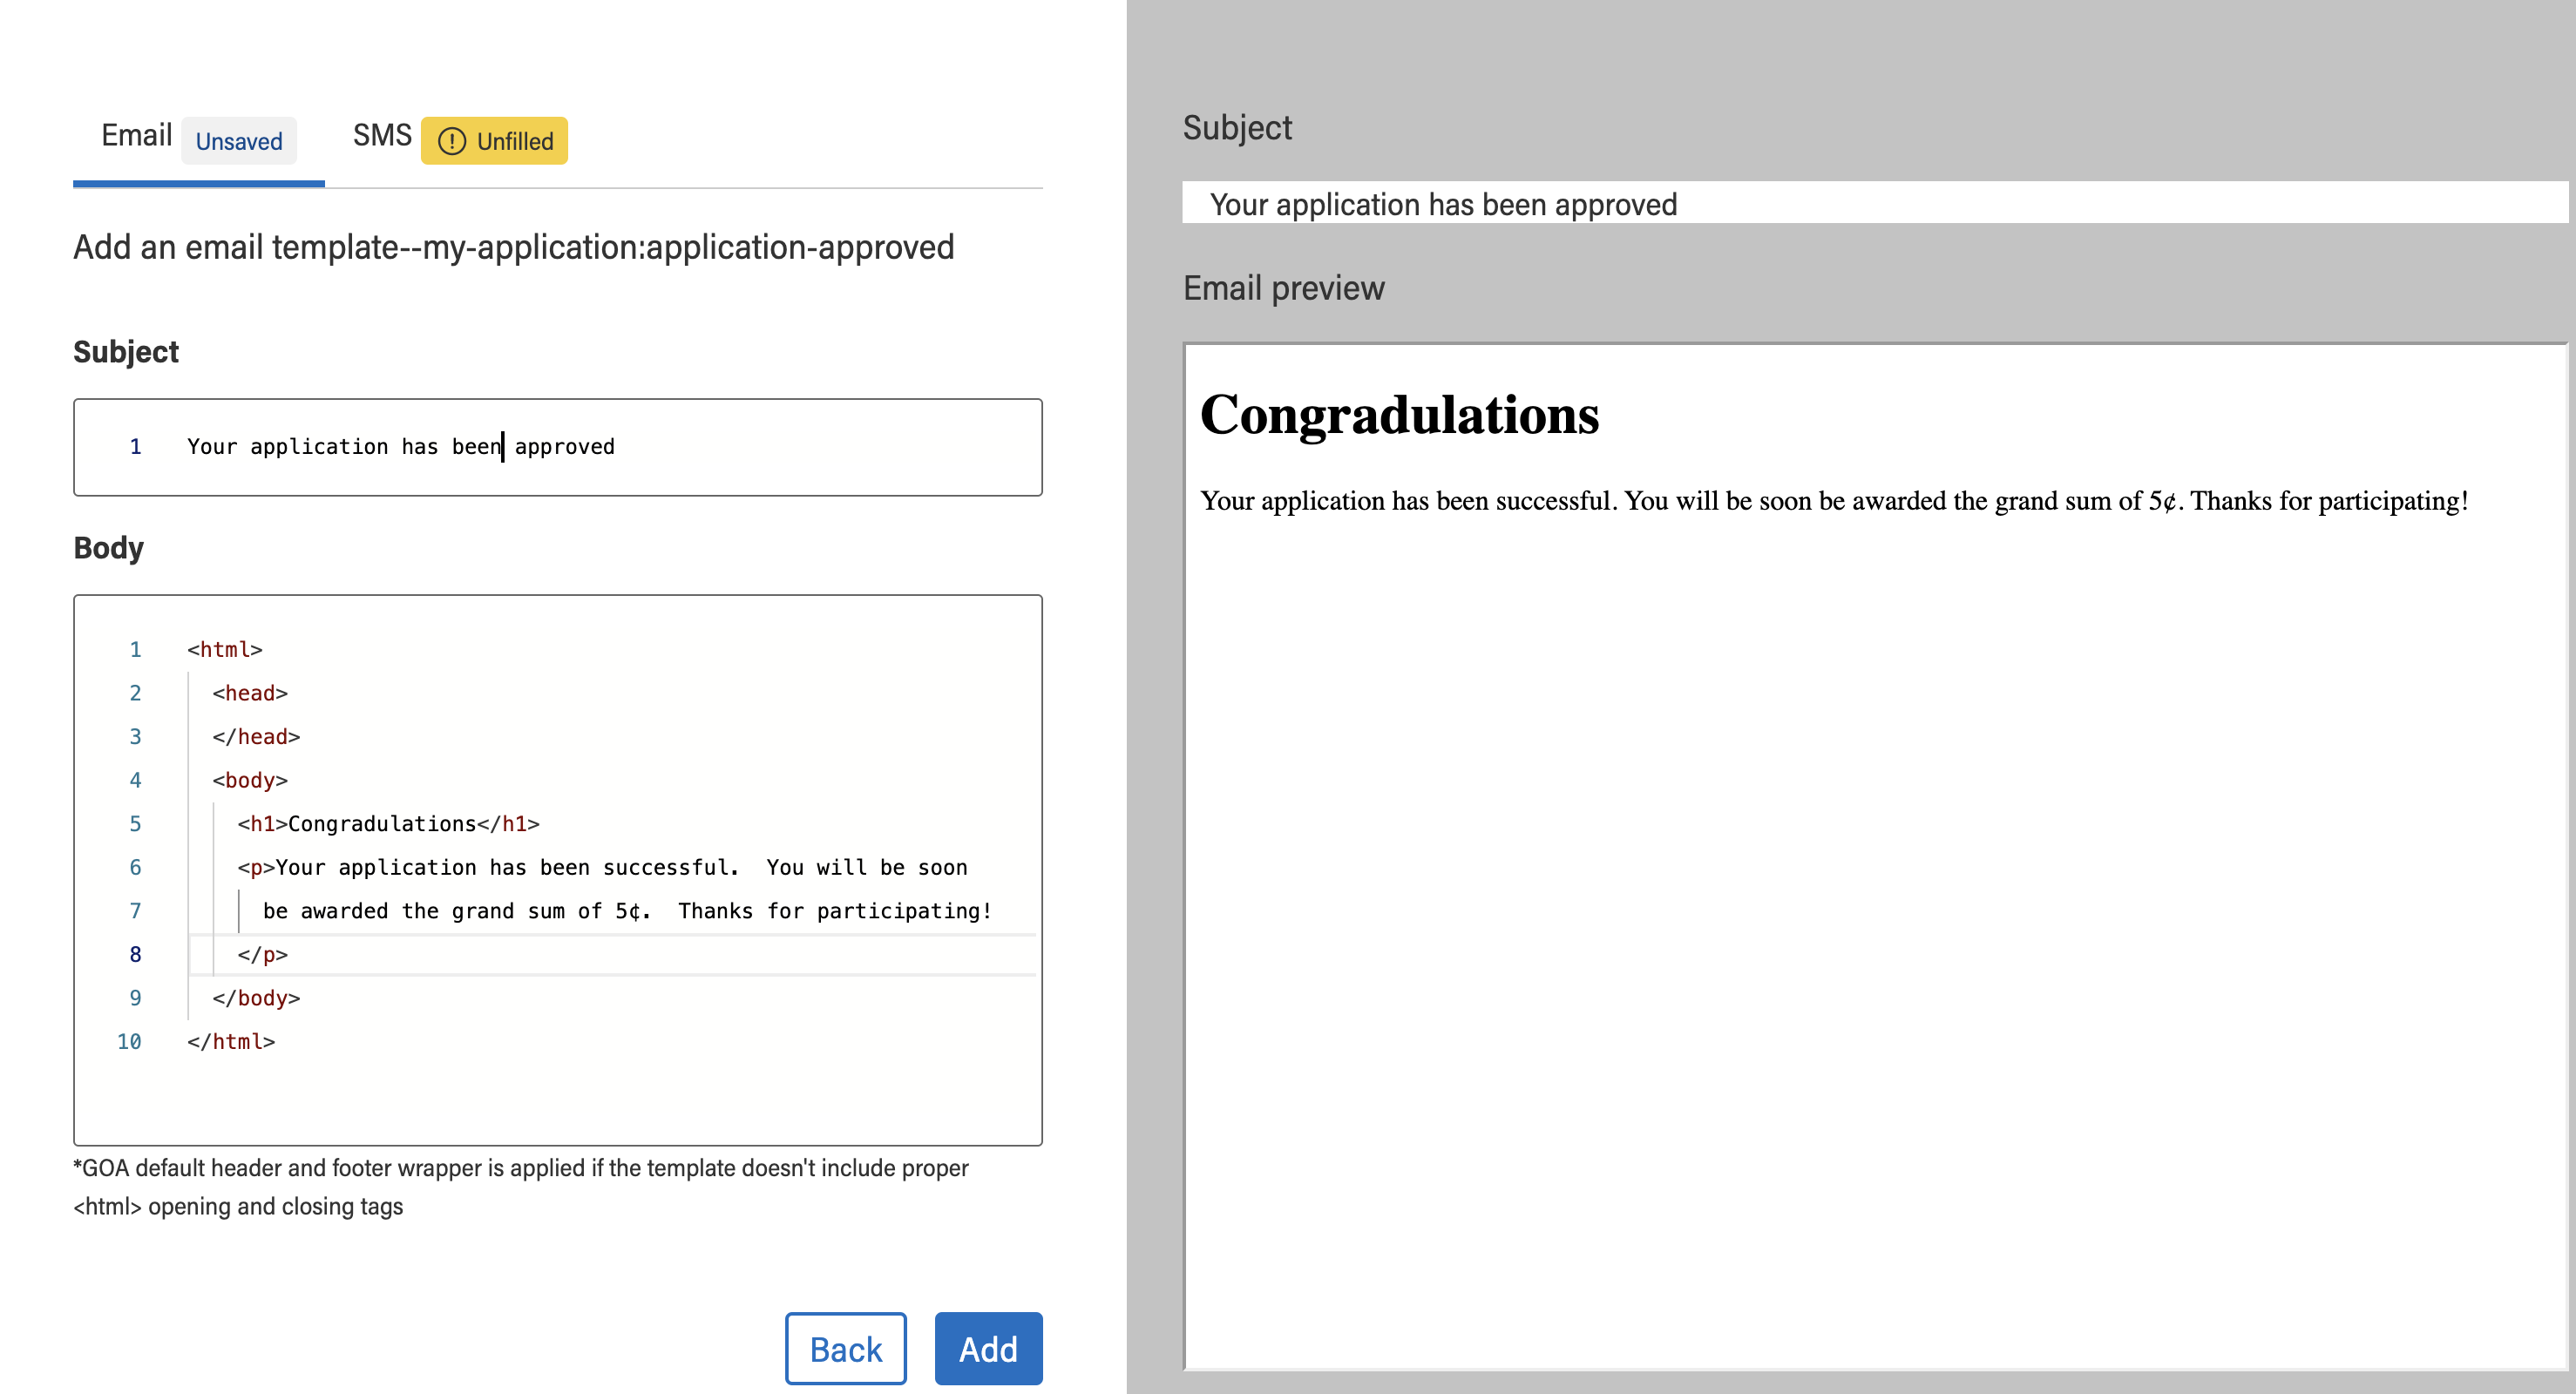
You can fully customize the email’s layout with HTML, as shown. However, the success of the layout is dependent on the email client of the receiver, and care should be used when developing your template. Consider following best practices for email template development, such as using inline styles, using tables for layout, testing across various clients, providing a plain text version of your email, and using tools like Litmus Scope to preview how your templates will render in different clients, particularly Outlook.
Customize your Messages
You can also customize the text of your messages using the Handlebars Template tool. Handlebars work with key value pairs: you embed keys into your template, which will then be replaced by values specified in the domain event that gets triggered by your application. Here’s an example. Suppose that instead of hard coding the value of the Grant in our example you wanted to make the amount variable, depending on the qualifications in the application. You could do this using Handlebars, using the following syntax for the message:

The event.payload prefix tells the notification service that this particular key refers to the domain event triggered, and the payload object it is triggered with i.e. the API call triggering the event has a payload object associated with it. In this example, the payload object would have an amount property with an appropriate value, like 5¢, or $5 if you’re feeling generous. Before the email is sent the template is processed to substitute its keys with the values in the payload. You can learn more about events and payloads here.
Text Messages
Unlike email, you cannot format text messages. You can, however, customize text messages with Handlebars, just as you would with the email templates.
Security
As with most ADSP products, the Notification Service security is based on keycloak roles. In particular, subscribers can only be added to a non-public Notification Type if they have the correct roles. You can specify which roles a subscriber must have when creating the Notification Type, i.e.
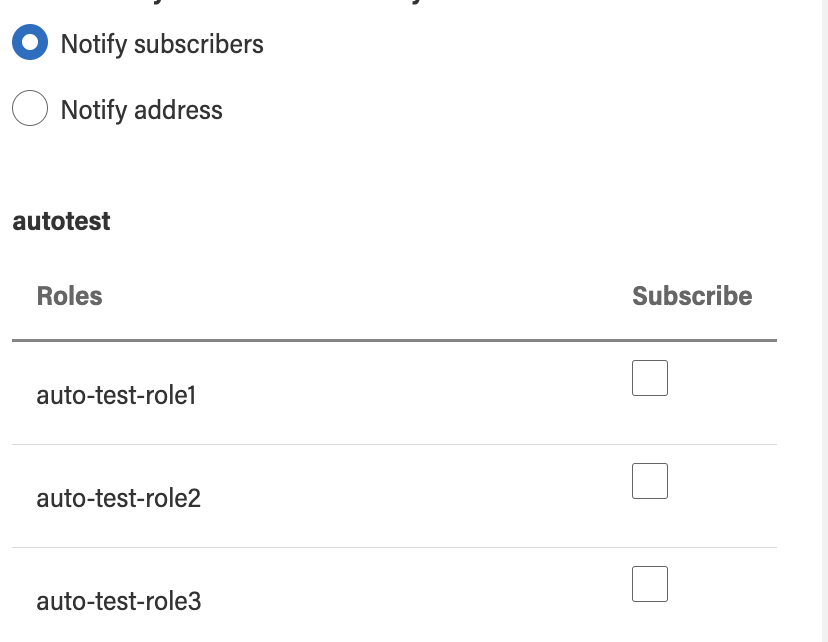
Subscriptions can also be public, requiring no roles, for anonymous users. Just check the “Make notification public” box when creating the notification type. Anyone, then, can be a subscriber.
Note: when using the direct notifications, where only an email address is needed, the notification type is always public.